Difference between revisions of "Finding a cache"
(→What to take with you) |
(→Replacing) |
||
| Line 37: | Line 37: | ||
Make sure that you close the container properly and then replace in exactly the same position/way as you found the cache. Be even more careful not to be seen doing this. If you think you may have been spotted, retreat to a safe distance and keep an eye on the cache location for a reasonable time. | Make sure that you close the container properly and then replace in exactly the same position/way as you found the cache. Be even more careful not to be seen doing this. If you think you may have been spotted, retreat to a safe distance and keep an eye on the cache location for a reasonable time. | ||
| + | |||
| + | Be aware of something called cache creep. This is the tendency of a cache to move around the original position in which is was hidden. Sometimes previous finders may decide that the place that they found the cache was not the best and may hide it over in the next tree where there is a better hole. They may decide to push it back under the bridge just that little bit further than when they found it. They may decide to rehide it on the opposite side of the track. Sometimes this is done unintentionally because they didn't really notice where they retrieved the cache from. A cache is rated according to the difficulty of the hide (as well as the terrain). If you move the cache upon replacing it, the difficulty level may change; either up or down. So when replacing a cache always return it to the same spot as it was retrieved, including putting back any rocks, branches, leaves the way you found it. Don't add to it. Don't take from it. | ||
==Logging== | ==Logging== | ||
Revision as of 19:40, 21 September 2005
Planning
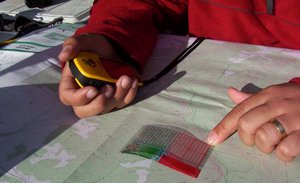
Some brief planning before your attempt on a cache can make the whole experience vastly more enjoyable. If your target is in a bush area, 10 minutes of planning can save you hours of walking because you didn't notice that river, ravine or freeway between you and the cache!
- Plot the cache on a map and find its general location
- Find the most appropriate entry point and route to the general location
- Look at different maps to make sure you pick up on those obscure tracks that may lead you to your eventual goal.
Use waypoint management software to categorise, classify and research the caches in your chosen area. Use this and mapping software to identify clusters of caches which can form the basis of a good caching trip.
Finding
Make sure that your GPS is set up the same way as everyone else's: select the co-ordinate style of DD.MM.mmm and choose the datum of WGS84. If you don't do this, then you are unlikely to find anything and anything you hide will be difficult for others to find.
Don't assume that your GPS will always lead you straight to the cache. This will be affected by the satellite signals at the time the cacher placed the cache and the quality of the signals at the time you are hunting. Occasionally, the coordinates will be completely off, so feel free to share this in a log in a suitable manner (see logging).
Be aware of the number of satellites that your GPS is tracking. This can be as few as 3 and as many as 12. The more the merrier, but sometimes you just have a crappy day. Also be aware of the geometric spread of satellites your unit can see: 4 satellites in a straight line in the sky won't give you very good accuracy!
If you're having trouble getting good reception, try moving around a bit: cliff faces, buildings and even yourself can block out that vital bird required to get a good fix. Hold your GPS as high as you can to give it a reasonably unrestricted view of the horizon. Climb a tree, scale a cliff, jump out to that rock in the middle of crashing waves - just to get a good signal!
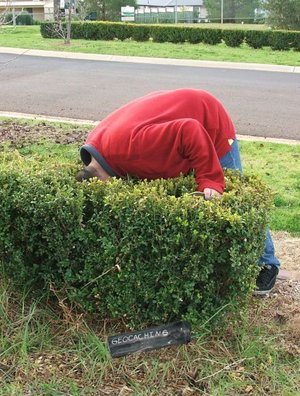
When your GPS tells you that you're within 5-10 metres, that's usually good enough, as you are getting close to ground zero. Put your backpack and GPS down and have a good look around the place. Look for semi-obvious hidey holes in the vicinity and check them thoroughly. If you don't find the cache/waypoint during this process, have another look at your GPS now that it's had a chance to settle/average. You might find that it indicates that the cache is closer, or on the other hand it might have decided that the cache is 15m away. Repeat this process and do the geocachers' spiral dance until you narrow down the search area and eventually find the cache!
If you're in a public area, try very hard not to give the game away. People are very suspicious these days, so it is wise to disguise your activities. Look at your GPS subtly and maybe pretend it is a phone or stick it in your pocket and bring out your camera if you are attracting too much attention.
Whatever happens don't give any of the non-geocachers (muggles) reason to believe that there may be something of interest near where you are standing. If it is too busy, abandon the search and come back another time. You may get to log a find by being careless, but the cache placer could lose a cache. And they will know who caused it!
Replacing
Make sure that you close the container properly and then replace in exactly the same position/way as you found the cache. Be even more careful not to be seen doing this. If you think you may have been spotted, retreat to a safe distance and keep an eye on the cache location for a reasonable time.
Be aware of something called cache creep. This is the tendency of a cache to move around the original position in which is was hidden. Sometimes previous finders may decide that the place that they found the cache was not the best and may hide it over in the next tree where there is a better hole. They may decide to push it back under the bridge just that little bit further than when they found it. They may decide to rehide it on the opposite side of the track. Sometimes this is done unintentionally because they didn't really notice where they retrieved the cache from. A cache is rated according to the difficulty of the hide (as well as the terrain). If you move the cache upon replacing it, the difficulty level may change; either up or down. So when replacing a cache always return it to the same spot as it was retrieved, including putting back any rocks, branches, leaves the way you found it. Don't add to it. Don't take from it.
Logging
Write what you want in the cache logbook, but when logging your find on the cache listing website, be careful not to give too much away. Don't provide detailed descriptions of the route you took, descriptions/photos of the type of cache container or the manner in which it was hidden. Feel free to mislead people, or to provide clever comments that will only make sense once someone has finally found the cache!
Swapping
If the cache is big enough you will likely find items in the cache, such as trinkets and souveneirs. These are swap items and you are welcome to take something with you, however it is generally considered appropriate to swap something of at least the same value (or preferably higher value) back into the cache container.
What to take with you
Other useful items:
To earn extra brownie points within the geocaching community, take a cache repair/replacement kit with you:
- duct tape
- spare geocaching.com and geocaching.com.au cache sheets
- zip-loc bags
- spare pens/pencils
- spare log-books
Plus for yourself:
- A first aid kit for that one time that you have a nasty fall...
- A mirror - for searching for those craftily hidden waypoints
- A pocket torch - for checking in those dark crevices, before blindly poking your hand in ( reduces need for item 1)
- A camera for recording those unforgettable moments ( like making use of item 1,after disregarding item 3)
- A water bottle, even in Winter.


